Includes MotionBuilder plugin installation and Unity Receiver setup steps.
Setup Guide
Install & Configure
Setup guide for MotionBuilder Live Sync For Unity, covering installation and receiver configuration.
MotionBuilder Plugin Setuplink
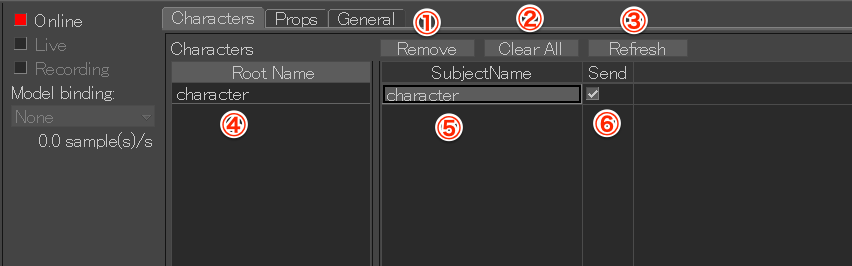
Characters Tab
Configure the characters you want to sync.
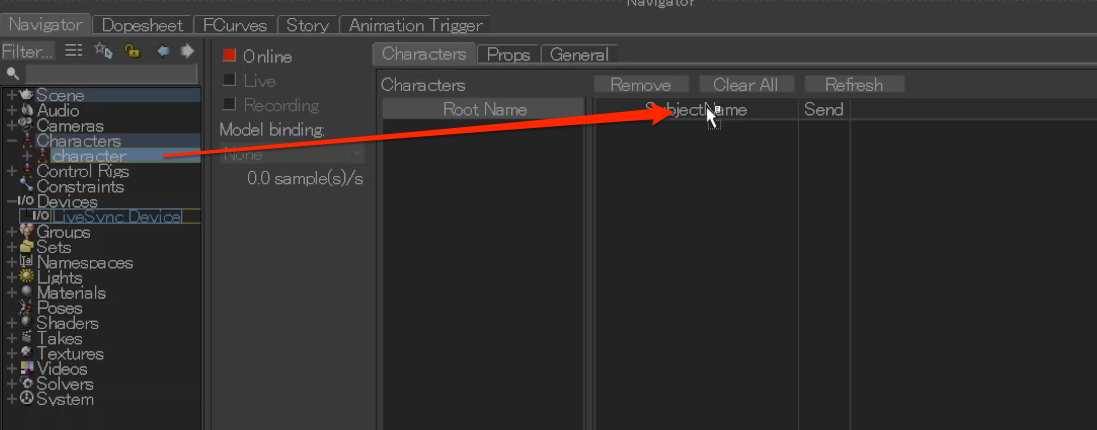
Add a Character
Drag a characterized Character from Navigator > Characters onto the table header to add it.
Fields
- "Remove" deletes the selected character.
- "Clear All" removes all characters.
- "Refresh" updates the list and adds all characterized characters.
- "Root Name" shows the character name.
- "Subject Name" is the identifier used in Unity. It can be edited by double-click.
- "Send" toggles data transmission.
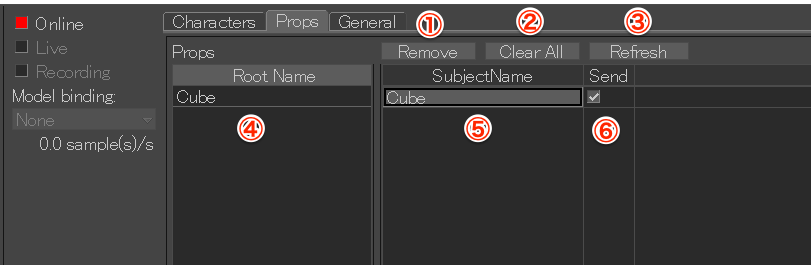
Props Tab
Configure the props you want to sync.
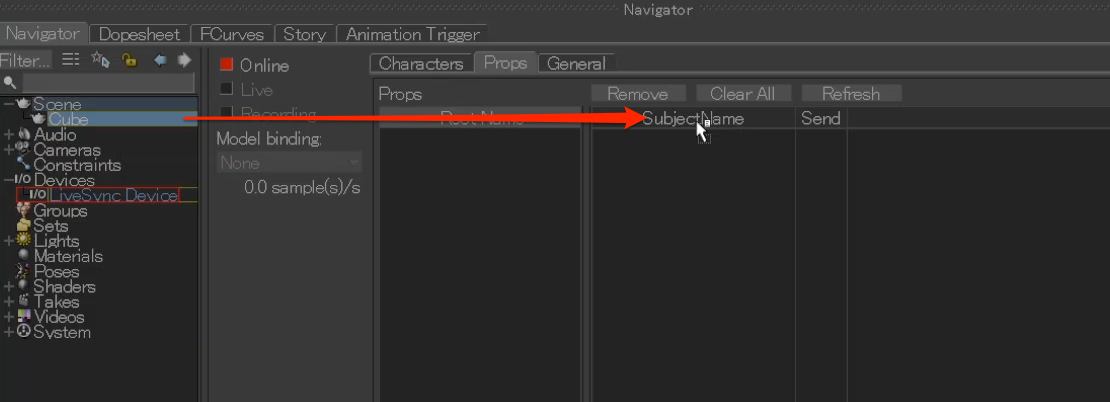
Add a Prop
Drag a scene node from Navigator > Scene onto the table header.
Fields
- "Remove" deletes the selected prop.
- "Clear All" removes all props.
- "Refresh" updates the list.
- "Root Name" shows the prop name.
- "Subject Name" is the identifier used in Unity.
- "Send" toggles data transmission.
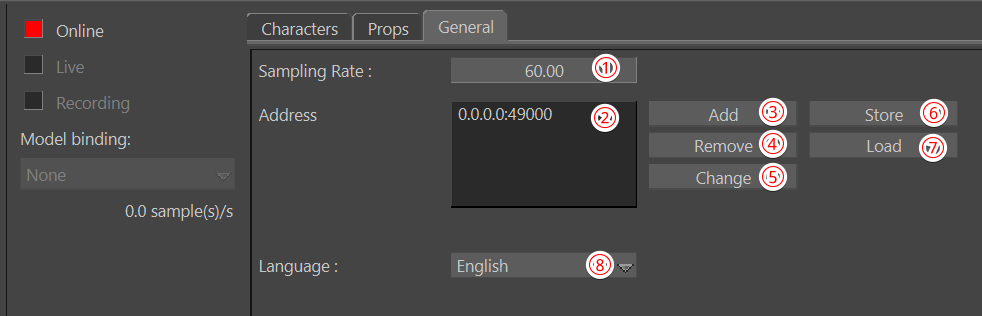
General Tab
Configure global settings.
- "Sample Rate" sets the sampling rate (default 60).
- "Address" shows the destination IP address and port.
- "Add" adds a destination in [IP:port] format.
- "Remove" deletes the selected destination.
- "Change" edits the selected destination.
- "Store" saves the destination list to the PC.
- "Load" loads a saved destination list.
- The language can be switched from the dropdown.
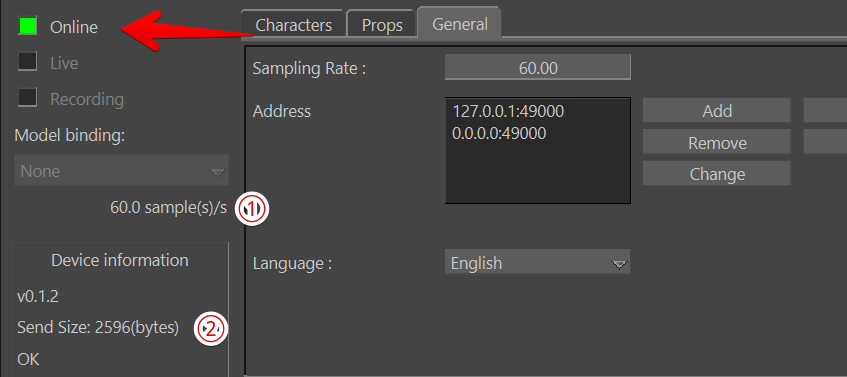
Start / Stop Synclink
Press "Online" to start or stop syncing. A green button indicates active transmission.
① shows packet rate, ② shows packet size.
Additional Featureslink
Save / Load in FBX
Include the device in FBX to save and load the following settings:
- Characters settings
- Props settings
- Destination address settings
Unity Setuplink
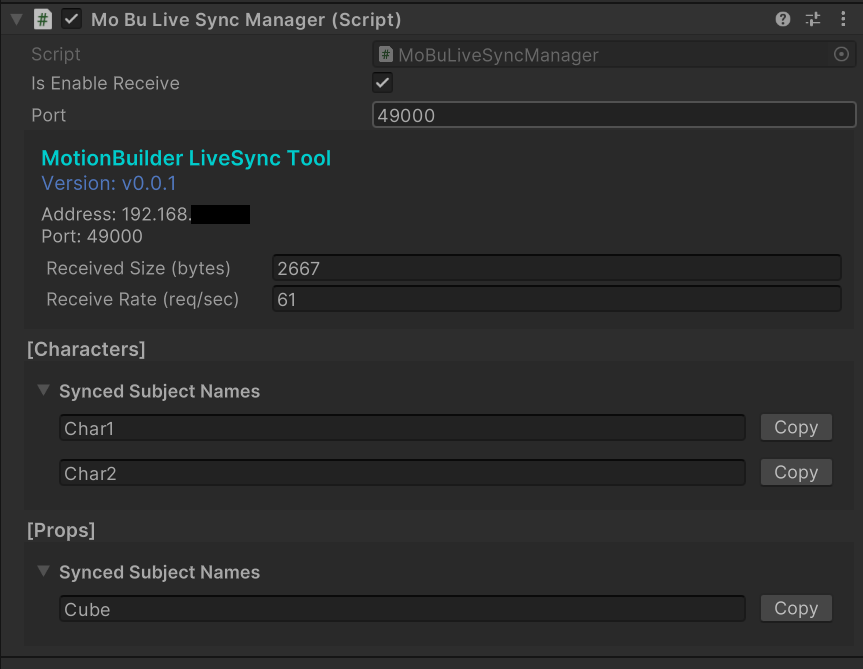
Add Receiver
- Add Asset/MoBuLiveSync/Prefabs/MoBuLiveSyncReceiver.prefab to the scene, or add MoBuLiveSyncManager.cs.
- Set the receive port (default: 49000) in the Inspector.
- Toggle "Is Enable Receiver" to enable/disable receiving.
While playing, the Inspector shows packet size, sampling rate, and subject names.
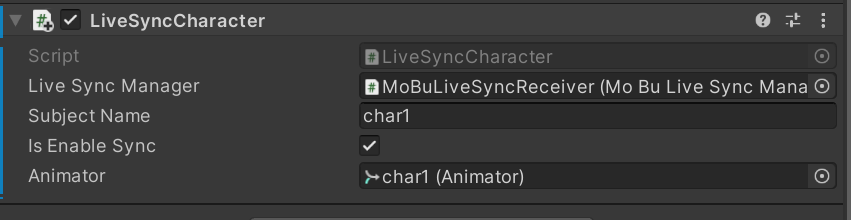
Character Setup
Add LiveSyncCharacter.cs or use MBSync > Add Sync Character.

Configure the following in the Inspector.
- Assign the Receiver to Live Sync Manager.
- Set Subject Name to match MotionBuilder.
- Toggle Is Enable Sync.
- Assign the Animator.
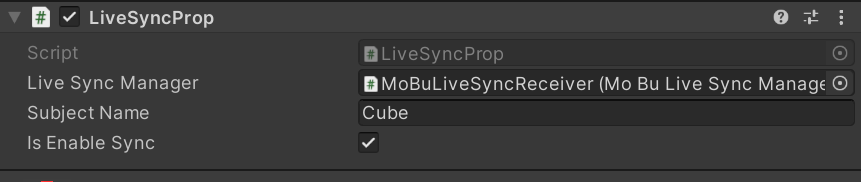
Prop Setup
Add LiveSyncProp.cs or use MBSync > Add Sync Prop.
- Assign the Receiver to Live Sync Manager.
- Set Subject Name to match MotionBuilder.
- Toggle Is Enable Sync.
Installation Guide
Install the MotionBuilder plugin and Unity receiver before configuration.