MotionBuilderUnityLive Sync
Includes MotionBuilder plugin installation and Unity Receiver setup steps.
Setup Guide
Install & Configure
Setup guide for MotionBuilder Live Sync For Unity, covering installation and receiver configuration.
The trial edition supports up to 1 character and 2 props. For more, the Unlimited edition is required.
Overviewlink
Sync characterized MotionBuilder Characters to Unity Humanoid Avatars, and MotionBuilder Props to Unity Objects with real-time Position / Rotation updates.
Characters: up to 1 (Trial)
Props: up to 2 (Trial)
Unlimited edition available
Install MotionBuilder Pluginlink
- Download the plugin from theDownload page.
- Quit MotionBuilder if it is running.
- Unzip the downloaded file.
- Copy the plugin (MoBuLiveSyncTool.dll) that matches your MotionBuilder version to the plugin folder.
Example for MotionBuilder 2023: copy 2023\MoBuLiveSyncTool.dll to C:\Program Files\Autodesk\MotionBuilder 2023\bin\x64\plugins.
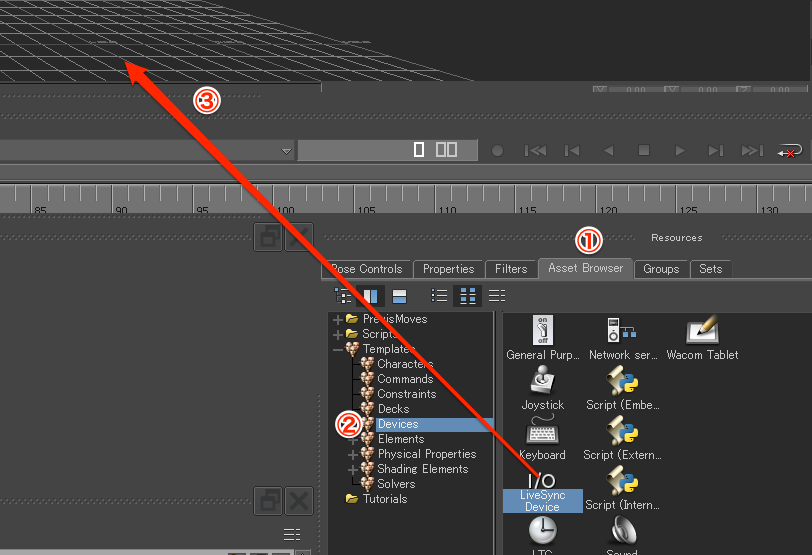
Import MotionBuilder Pluginlink
- Open the Asset Browser tab in the Resources window.
- Click Templates > Devices.
- Drag "LiveSyncDevice" into the scene.
- Check Navigator > Devices to confirm the import.
Install the Unity Receiverlink
Install the Unity receiver library from theDownload page or fromGitHub.
1. Install via Unity Package Manager
Add the URL from the GitHub README to Package Manager.
https://github.com/nasshu2916/MotionBuilder-Live-Sync-Unity.git?path=/Assets/MoBuLiveSync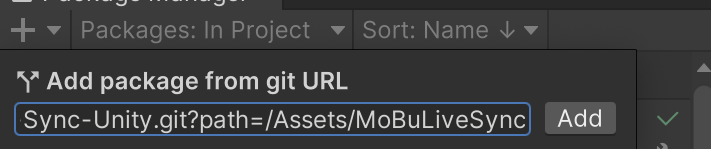
2. Install manually
Clone the repository and add Assets/MoBuLiveSync to your Unity project.
Plugin Setup & Usage
Configure MotionBuilder and Unity, then start syncing.